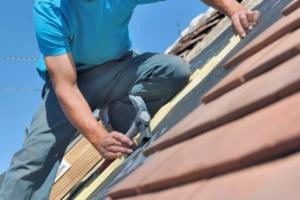
High Point Roofing is essential to protecting homes and businesses from the elements. It is important to understand the different facets of roofing so that you can make informed decisions about your home or business.
Many resources are available to help prevent falls in the roofing industry, including fall prevention plans, ladder safety mobile app, infographics, tipsheets, and toolbox talks.
Shingles are the part of your roof that protects the materials beneath it from the elements. They are made of a variety of durable materials that can withstand different weather conditions, including rain and wind. When shingles are properly installed and maintained, they can last for several decades without needing replacement. However, a damaged or missing shingle can compromise the integrity of your home and increase the risk of water leaks.
Shingle roofing is a great option for homeowners who want to increase the aesthetic appeal of their house. They come in a variety of shapes, sizes and colors and can enhance the style of any architectural design. The most common type of shingle is the asphalt fiberglass laminated shingle, which comes in three categories — entry-level or 3-tab traditional, medium grade or architectural and designer or premium grades. Each category varies in weight and quality, which affects how long a shingle lasts.
A shingle is a thin, rectangular piece of material that covers the surface of your roof. They are nailed to each other and to the roof using an adhesive that is heat-activated. The shingles are also designed to overlap, creating a barrier that keeps rain and other elements from entering your home.
Wood shingles are made of cedar or pine. Newer versions are treated with chemical preservatives to prevent rot and insects. They can be painted or stained to match the other design features of your home. The natural texture and appearance of wood shingles make them a perfect fit for cottages, coastal or traditional homes.
Asphalt shingle roofs are made of various materials, from basic fiberglass to organic compounds like coal tar and pitch. Fiberglass shingles have a lifetime of about 20 years, while organic shingles are rated for up to 40 years.
When installing asphalt shingles, it is important to follow the manufacturer’s instructions and to install flashing around plumbing stacks and vents. These metal pieces help to keep water from seeping under the shingles and into your home. It’s also a good idea to use an ice and water membrane under the shingles at the valleys, where the roof meets vertical walls.
Asphalt
Asphalt is an important ingredient in roofing materials, but it has a variety of other applications as well. It is used in road construction to create durable, smooth surfaces that can withstand heavy traffic. It can also be used to line canals and dams. Its durability and affordability make it a popular choice for roofs and other structures that require waterproofing. The process of mixing asphalt requires heat and a high level of expertise, so it is important to choose the right mixture for each job.
Different asphalt mixes are suited for different types of pavements. Surface asphalt mixes are designed to be long-lasting and sacrificial, wearing down before the structure’s underlying layers. They can be made to vary in stiffness depending on the type of vehicle that will use the pavement and the climate where it is being used. This enables the asphalt to provide different performance characteristics in terms of surface durability, tire wear, braking efficiency and roadway noise reduction.
Recycled asphalt shingles (RAS) are another type of asphalt product. This material is derived from waste products generated by the manufacture of new asphalt shingles or from the tear-off and installation scrap from existing shingle roofs. RAS can be used to create new asphalt pavements and offer cost savings as well as points towards LEED certification.
However, if not mixed properly, recycled asphalt can fail in its intended application. Using the wrong mix can cause problems with the bond between the aggregate and bitumen, which can lead to rutting. In addition, if the asphalt is not stiff enough, it will crack under the load of vehicles. The asphalt must be able to resist deformation under pressure, and the stiffness of the material can be measured by testing its ability to withstand chewing.
To achieve the desired stiffness, the asphalt is often modified with a small amount of styrenic diene block copolymer. This additive will help to reduce the asphalt’s temperature susceptibility and increase its toughness, flexibility and elastic recovery. This is an essential step in ensuring the longevity of an asphalt pavement.
Fiberglass mat
Fiberglass mats are used in many different applications, including roofing membranes. This type of material is lightweight, waterproof, and has excellent insulation properties. It is also easy to install and maintain. It is also resistant to corrosion, mildew, and mold. It is ideal for use in wet areas and can be installed on any type of surface.
A fiberglass mat can be tailormade to fit the needs of a specific application by adjusting for instance the glass (glass type, fiber sizing, fiber length, and fiber mixture), the binder systems, the mat thickness, and the mat density. Fiberglass mats are produced using either a wet lay or dry process, and can be made with various types of glass fibers. Some of the most commonly used types of glass fibers in the manufacture of fiberglass mats include E, T, and C type.
Unlike fiberglass cloth, which is woven together to create a fabric, fiberglass mat is chopped and then held together with a resin binder. This makes it more affordable, and the short strands of fibers are randomly oriented, making it easier to conform to tight corners and curves. It is compatible with polyester and vinyl ester resin, but it is not compatible with epoxy resin, which requires styrene to dissolve.
The wet-lay method of manufacturing fiberglass nonwoven mats involves forming a dilute aqueous slurry of fibers, which is then deposited on an inclined moving screen forming wire to dewater the slurry and form a wet nonwoven fibrous mat. After forming the mat, it is then transferred to a binder application saturating station, where a modified UF resin based binder is applied to the mat. The mat is then dried, and the saturating solution and excess binder are removed.
This type of mat is widely used in the construction industry because it provides a waterproof, weatherproof base for SBS-modified bitumen. It also has excellent durability and is a cost-effective option for roof repair. Moreover, it is highly resistant to cracking and aging, which makes it an ideal choice for wet-lay roofing materials.
Besides being waterproof, fiberglass mats are also easy to cut and handle, making them an attractive option for DIY projects. You can also use them for a variety of household fixtures, such as shower stalls and bathtubs. It is available in large, carpet-like rolls and can be purchased at most home improvement stores.
Flashing
A crucial part of your roof’s structure, flashing is a layer of impervious material that prevents water penetration into a home. It also directs rainwater away from vulnerable areas, such as seams, joints, and projections. It is installed at strategic junctures, such as where the roof plane meets a vertical surface like a wall or dormer, and around features that protrude through the roof, such as chimneys and skylights. Without flashing, water could seep into these areas and damage the underlying sheathing or shingles.
Roof flashing is typically made of metal, though it can be made of other materials as well. It is important to select the right flashing for your roof, and a professional roofing contractor can assist you with this process. Aside from cost, there are other factors to consider, such as a roof’s pitch and the type of pipe that needs to be protected.
There are many different types of roof flashing, but they all serve the same purpose: to protect a roofing system from harsh weather conditions. Common flashings include chimney flashing, which seals the area around a chimney to prevent leakage, and vent pipe flashing, which seals the area around plumbing pipes that extend through the roof. Flashing can be found in a range of shapes and sizes, and is available in a variety of materials, including aluminum, copper, and galvanized steel.
Some flashings are even designed to enhance a roof’s aesthetic. They are often colored to match the shingles or trim, which can help make the whole structure look more cohesive and appealing. The installation of roof flashing can be tricky, but a skilled roofing professional will ensure that it is done correctly and securely.
When installing roof flashing, you will need to carefully measure the gap where it will be installed, and cut the flashing to size using a utility knife or tin snips. Afterwards, you will need to dry fit the piece in the desired location and make sure it fits properly before securing it with roofing nails. If you are using multiple pieces of flashing, each should overlap the other to create a strong, waterproof seal.